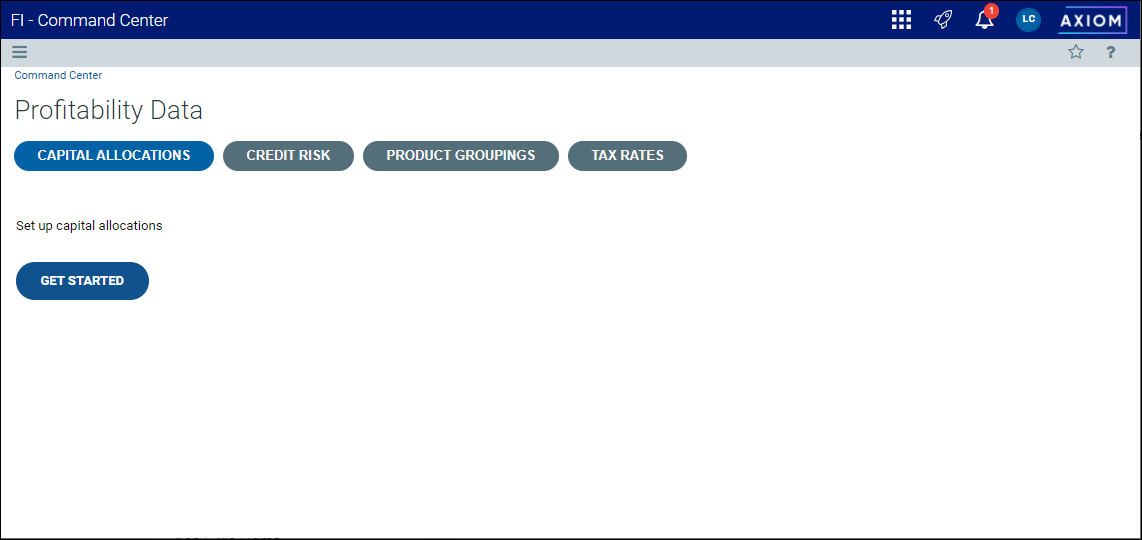
Setting up capital allocations
The Capital Allocations tab allows you to define how capital will be allocated to different products for budgeting, organizational profitability, customer account profitability, and RPPS. This single entry provides consistency across multiple solutions and reduces the effort required to manage your capital allocations.
The first time you open the Capital Allocations page, you will need to set up your capital allocations.
Once you have completed the one-time setup, you can make additional changes to your risk groups, risk scale, risk categories, and RAROC hurdle rate using the various sub-tabs on the Capital Allocations page.
Click image to view full size
Setting up capital allocations
When you enter the Capital Allocations page for the first time, the screen simply displays a Get Started button. On subsequent visits, the furthest step you have completed will be highlighted.
There are five steps to setting up capital allocations:
After you have set up your capital allocations, you will be prompted to establish an historical baseline.
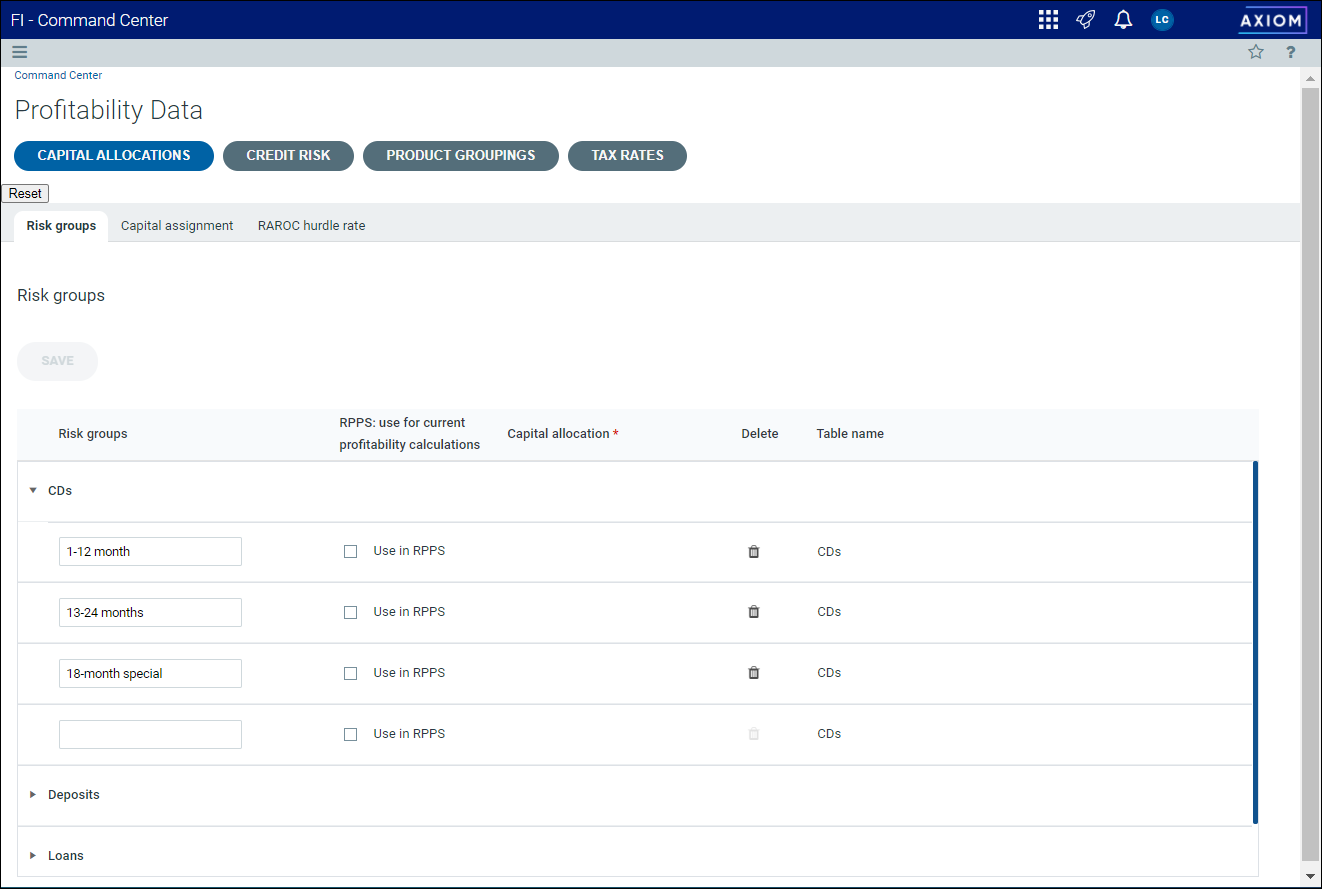
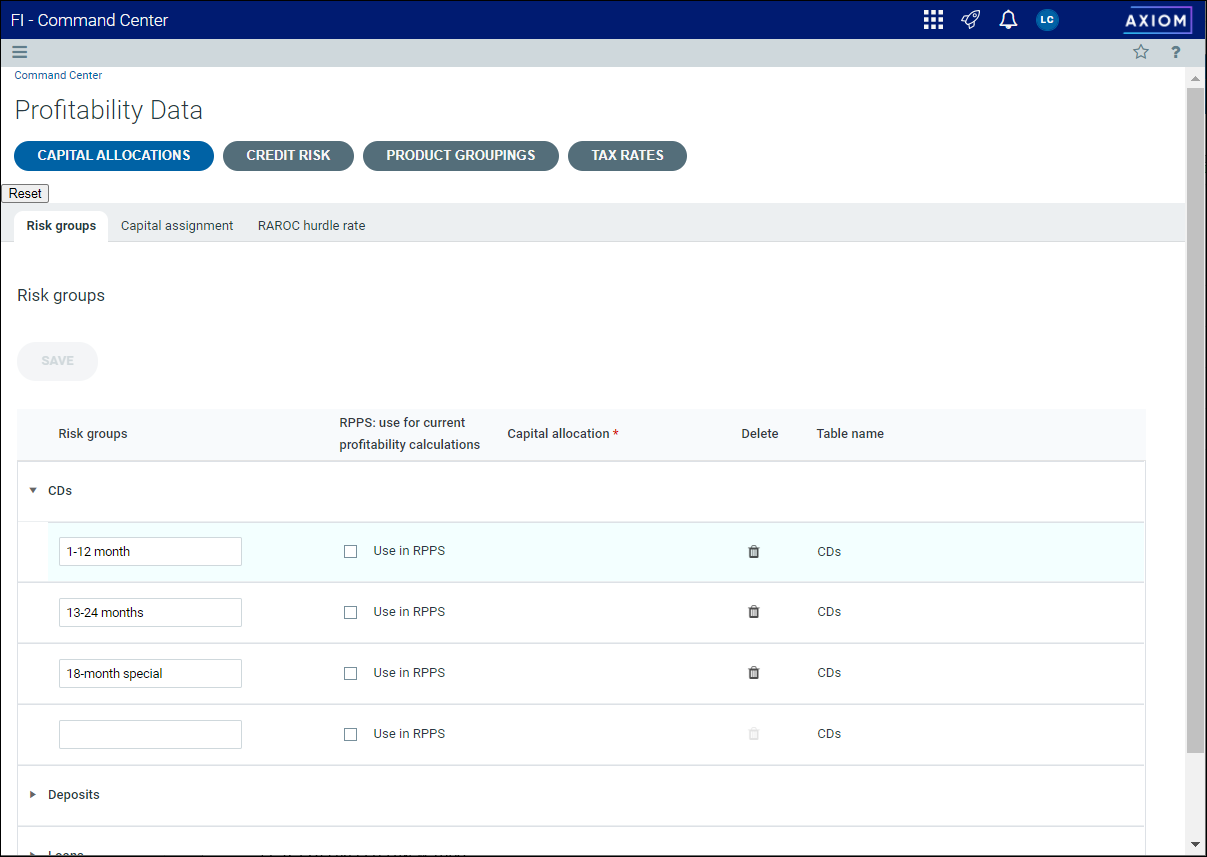
Step 1: Define instrument risk groups
To define instrument risk groups:
- From the Command Center, click Profitability Data.
- Click the Capital Allocations tab, and then click Get Started.
- Click the arrow next to CDs, Deposits, or Loans to expand the group.
-
Enter a name for each risk group you want to add.

Click image to view full size
NOTE: When you place your cursor in the last row, a new blank row will be created automatically.
- [Optional] Select the RPPS: use for current profitability calculations check box.
- Click Save + Continue to move to Step 2.
TIP: You can delete a risk group at any time by clicking the Delete icon in the appropriate row.
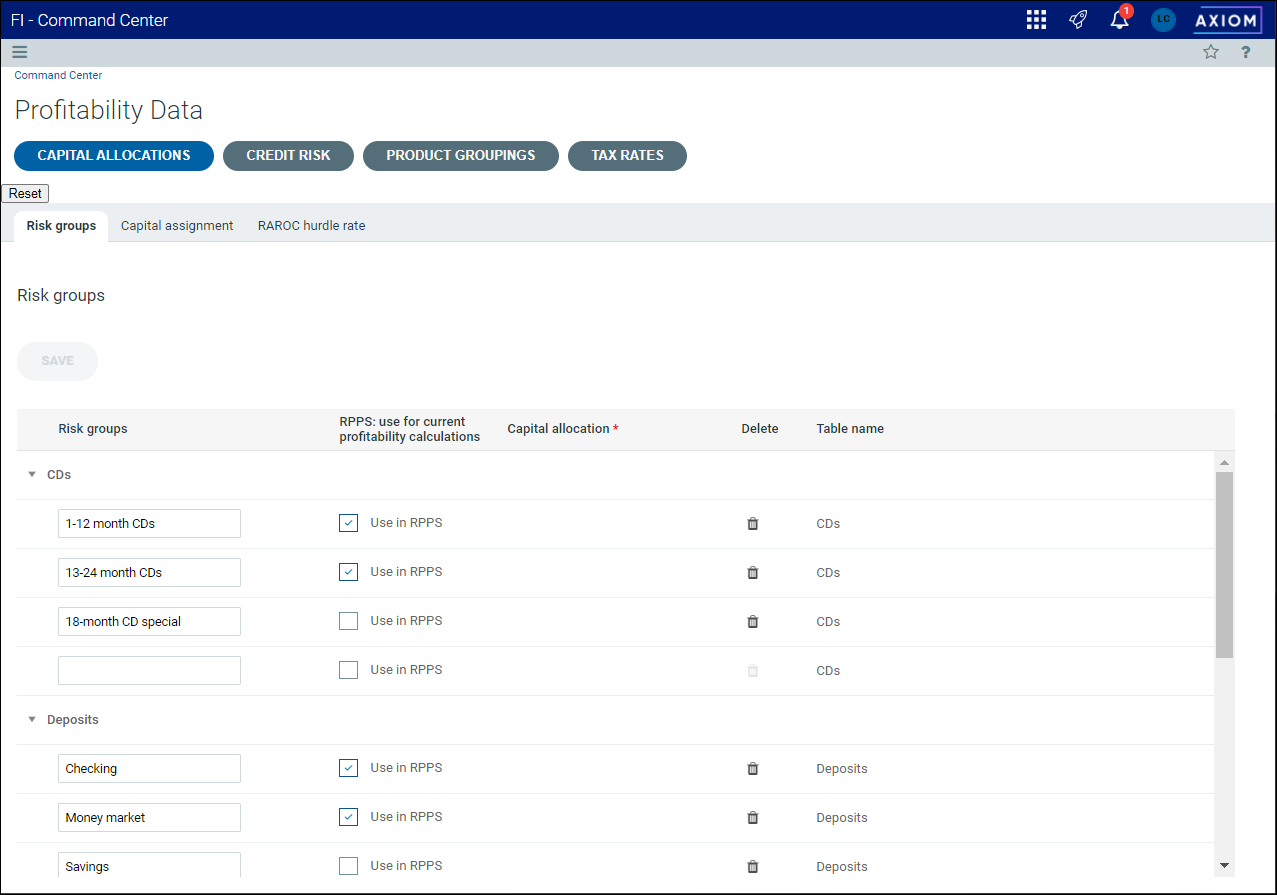
Step 2: Manage fee-based risk groups
Fee-based risk groups are created by data imports. This step allows you to update the RPPS setting and capital allocation for each fee-based group. You cannot add new fee-based groups.
To manage fee-based risk groups:
-
On the Fee-based risk groups page of the wizard, select or clear the RPPS: Use for current profitability calculations setting for each group.
-
Select a new value in the Capital allocation column, if needed.

Click image to view full size
- Click Save + Continue to move to Step 3.

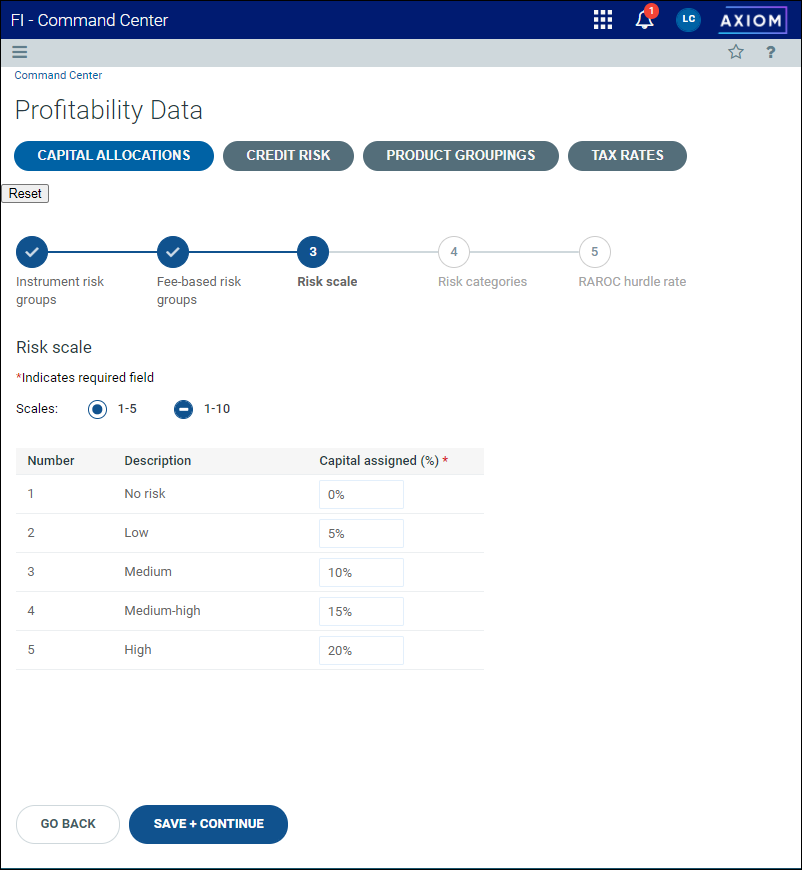
You can set your risk scale from one to five or, if you prefer more granularity, from one to 10. For each value in the scale, you must assign the capital necessary to back it.
TIP: The Capital assignment setting for the highest value in the scale is generally twice the number assigned to the Medium value. So, if your Medium setting is 10-12%, you would set the highest value to 20-24%.
To set your risk scale:
-
On the Risk scale page of the setup wizard, select the option for 1—5 or for 1—10.
-
Enter the percentage of capital required for each value in the Capital assigned (%) field. This number must be between 0 and 100.

Click image to view full size
-
Click Save + Continue to move to Step 4.
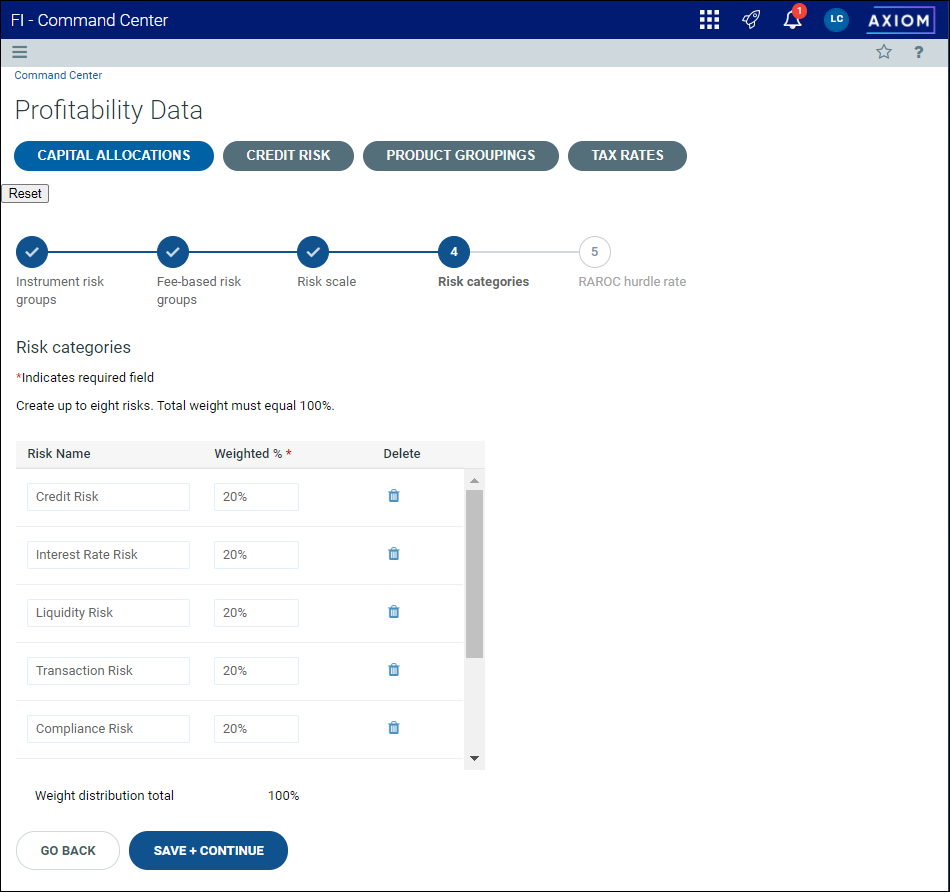
Step 4: Create risk categories
To create risk categories:
-
On the Risk categories page of the setup wizard, enter up to eight categories.

Click image to view full size
- Enter a weight for each type of risk. The sum of all weights must equal 100%.
- Click Save + Continue to move to step 5.
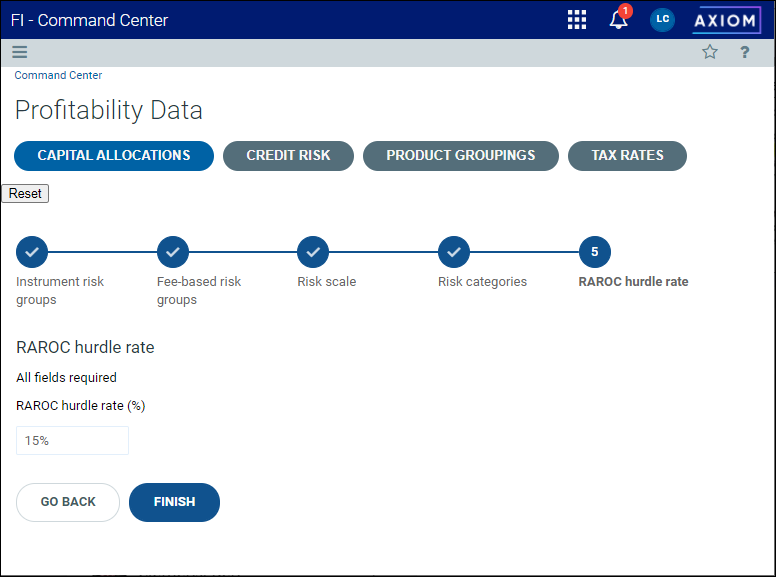
As part of the setup process, you need to set the RAROC hurdle rate. Setting a centralized hurdle rate allows you to compare calculated RAROC to your organization's target hurdle rate.
To set up the RAROC hurdle rate:
-
On the RAROC hurdle rate page of the setup wizard, enter the hurdle rate as a whole number (15 = 15%).

Click image to view full size
- Click Finish.
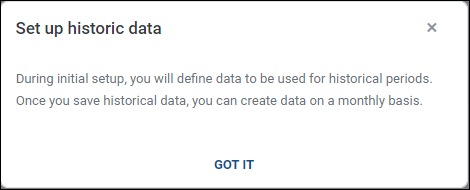
Establishing an historical baseline
After you have completed steps 1—5 of the Capital Allocations setup, you will be prompted to set up historical data.
Click image to view full size
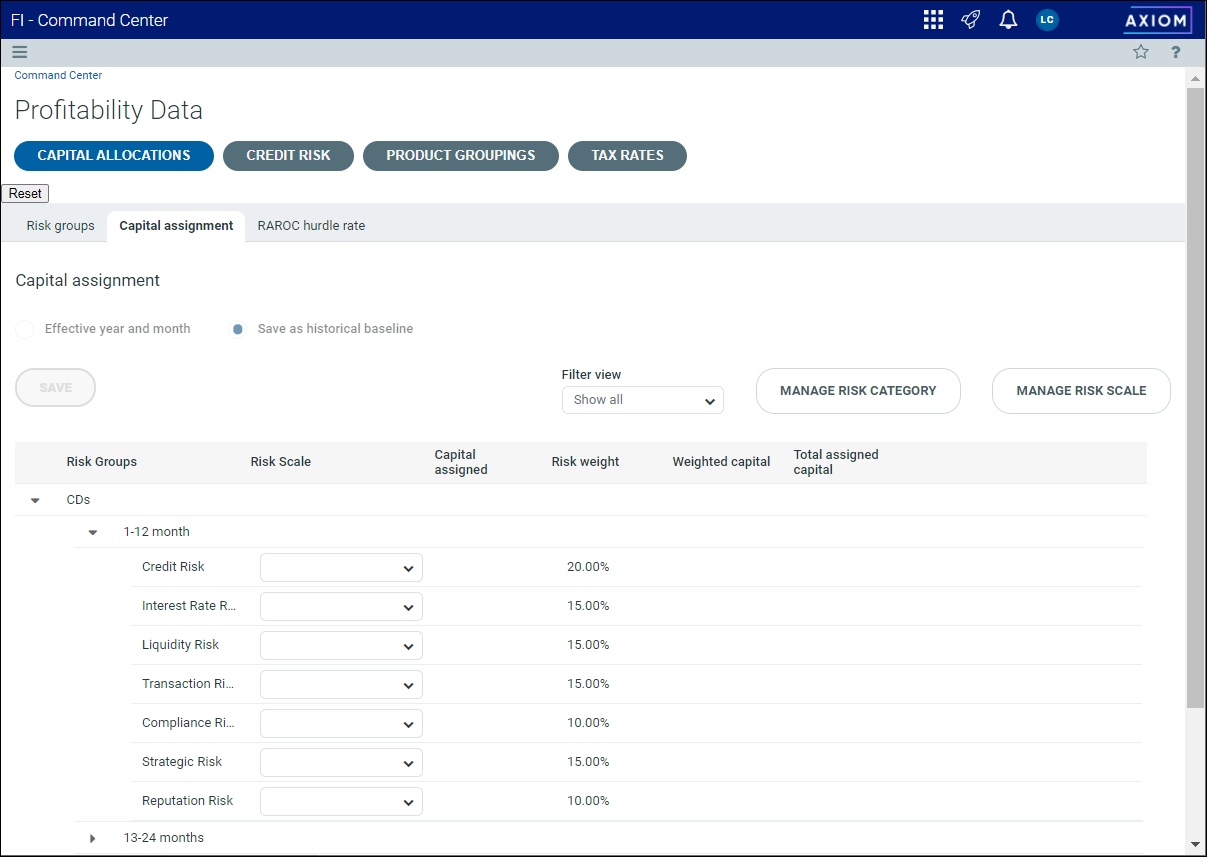
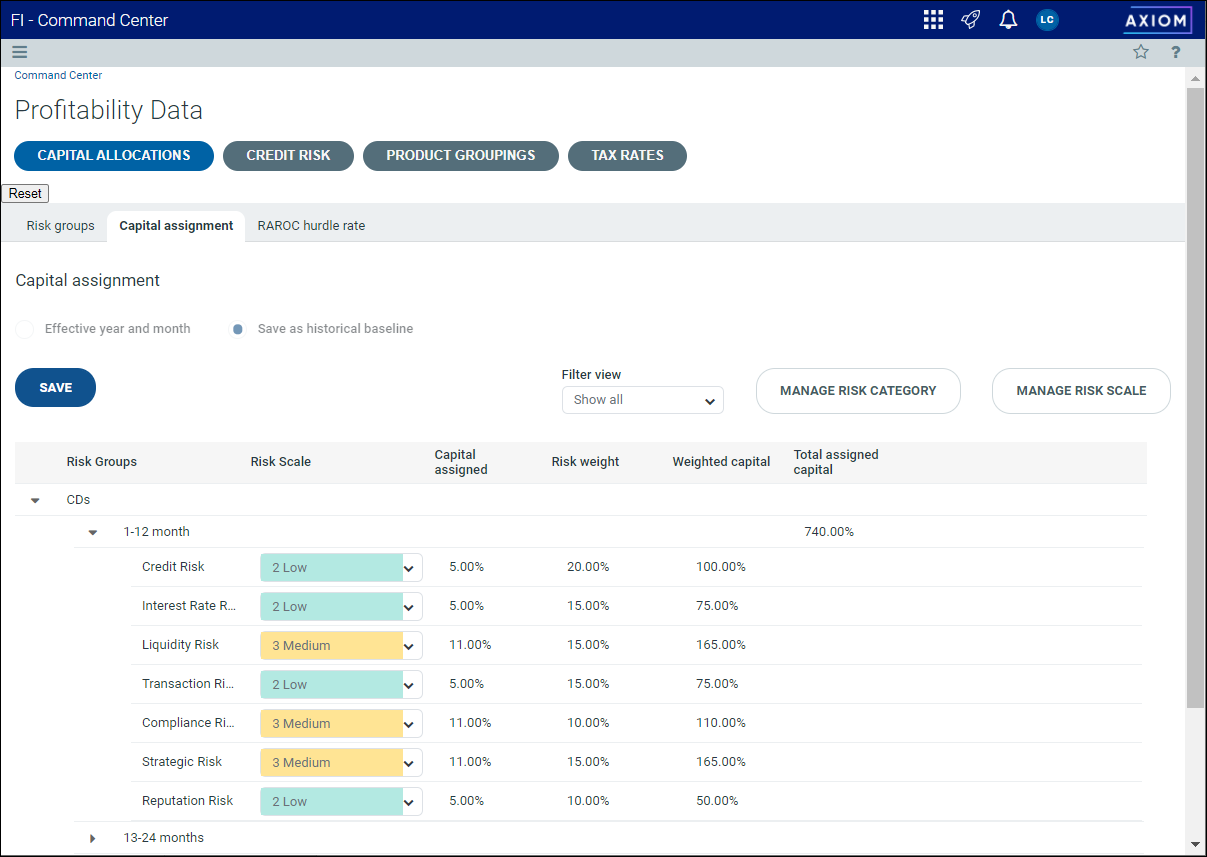
To set up an historical baseline:
-
Click Got It in the Set up historical data dialog to open the Capital assignment tab.

-
Click the arrow next to CDs to expand the group.
-
Click the arrow next to the first CD group to expand it.

-
For each item in the group, select a value in the Risk Scale drop-down list.

-
Repeat step 4 for each type of risk group (Deposits, Loans, Fee-based).
-
When you've assigned a risk scale for each item, click Save.
-
Click OK at the prompt.
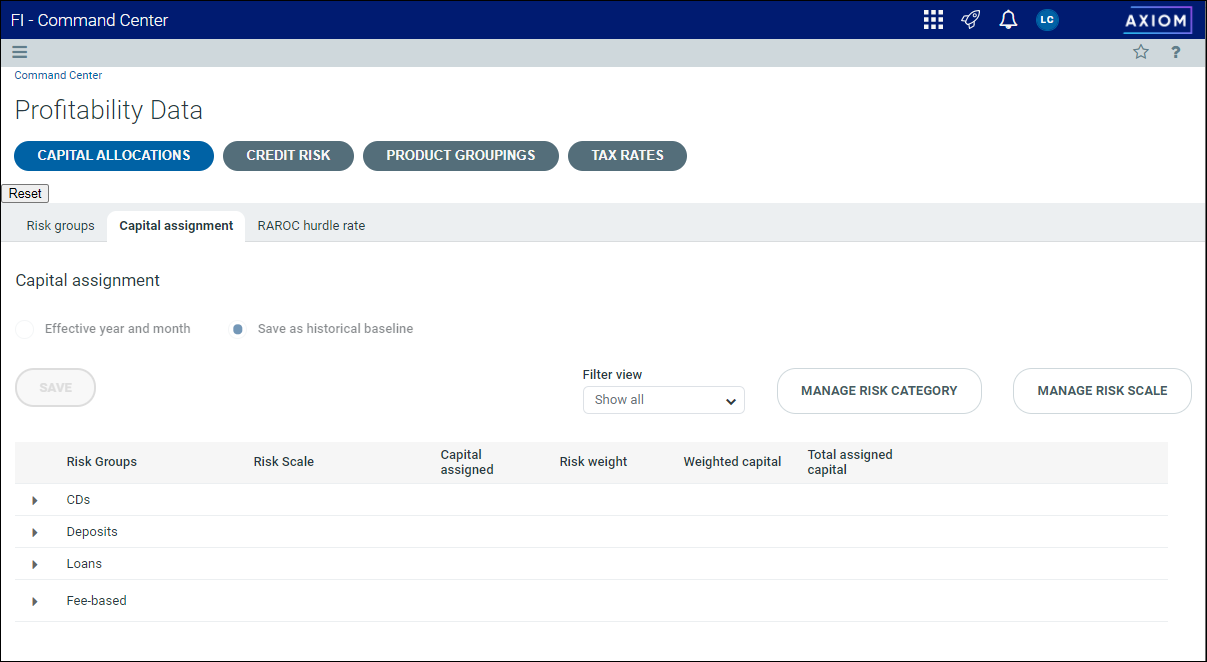
Once you have completed the setup, the Capital Allocations page displays three sub-tabs, which allow you to edit your settings:
For more information, see the following topics:
